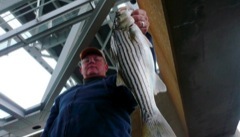
The Chesapeake Bay Bridge, officially named the William Preston Lane Jr Memorial Bridge, crosses the Chesapeake Bay near Annapolis, MD. Officially opened as one span with 2-way traffic in 1952, it replaced two ferries that connected the metro areas of Washington DC and Baltimore to Maryland’s Eastern Shore. A parallel northern span was opened in 1973 adding 3 more lanes. When the bridge was built it was the world’s longest continuous over-water steel structure at 4.35 miles long. It has more than 400 steel & concrete pilings and over 2 miles of rip-rap lined access roads creating an exceptional habitat for striped bass.
Stripers in the Bay prefer places where the current is funneled so that it runs more swiftly. They also like obstructions that interrupt the natural flow of the tides. The Bay Bridge provides both. Additionally, it is located in an area where the fresh water of several large rivers meets the salt water of the Atlantic. The southern span of the bridge includes two large man-made rock islands commonly referred to as rock piles. The rock piles are not essential to the span, but they’re put there to protect important structural elements from wayward ships. All these elements combine to make one of the best all-around fishing spots in the Mid-Atlantic region.
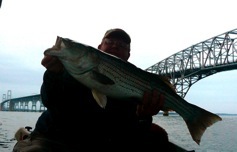 The bridge is easily accessible by two good boat ramps. On the West side at Sandy Point State park where admission is $4.00 per person, or on the east side at the DNR managed Mattapeake Ramp & Pier on Kent Island where it costs $10.00 per vehicle to park and launch (or a Queen Anne’s County ramp sticker). At Sandy Point, there are 22 ramps and ample parking for even the busiest weekends, but since it is a state park with a beach and other facilities, traffic at the gate can be heavy. The Mattapeake ramp requires about 100 yards of backing and is not recommended for boats over 25 feet in length. Parking there is limited.
When I first learned I would be moving to the Bay Bridge region of Maryland I read as many books as I could find hoping to learn whatever I could about area fishing spots. A recurring theme in everything I read was “there is good fishing around the Bay Bridge.” I remember my son Cory saying to me one day, “Dad, I can’t wait to get up there and fish that bridge.” I was thinking the same thing. A thousand plus fishing trips later, I still feel the same way. I can’t wait to get out there and fish that bridge!
There are many techniques and methods that will catch fish around the bridge. The strategies outlined here do not include the frequently used and often successful bait-fishing methods employed by many anglers. I use artificial lures with light casting or spinning outfits almost exclusively. My strategies for fishing the bridge are tried and proven and will produce even when the fish are not very active.
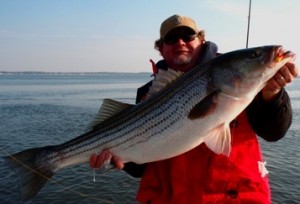
The Bay Bridge is a year round fishery. In the early spring the rock piles can provide good cover and resting points for large stripers that are migrating from the ocean up to spawning grounds of the Susquehanna Flats. In the summer and fall, baitfish are attracted to the cover of the pilings providing an ample food supply for resident rockfish. On warm summer days you’re likely to encounter breaking fish, surface-blitzing rockfish right under the bridge. Fall brings the best fishing of the year as stripers bulk up for the cold weather. Some rockfish winter over in the Bay instead of migrating farther south and can be caught even on the coldest days of winter. I managed to land a 42-inch striped bass the first week of February at the Bay Bridge this year.
Current vs. Tides
In January and February I’ll make a few exploratory trips to the bridge and often find good fishing. Current is an essential element to bridge fishing. Stripers always bite better in moving water. In order to make the most of fishing the bridge you should have some understanding of how currents work compared to the predicted tides. The closest tide prediction station is located very close by at Sandy Point. You can find the predictions for high and low tides on many websites and in a number of magazines and other periodicals.
 An easy mistake to make is to look at the tides and decide it will be slack current at exactly the same time as either the predicted high or low tide. It won’t. The current at the bridge can run for as long as 3 hours past the predicted tide-changes. I look at fishing a little like surfing and think of the tide as a giant wave moving up or down the Bay. A wave is highest at the crest. That’s when high tide occurs, but it continues to flow even after the crest has passed. The strongest currents occur right before the wave peaks. That’s when I want to be lined up at the most optimum location ready to drop-in and take advantage of the flow.
In addition tidal currents other factors influence the flow of water at the Bay Bridge. These factors include wind, rain-water flowing from area rivers, off-shore storms, and even water discharges from upstream dams. My rule of thumb is to take the predicted high or low and add two hours of current. For example, if low tide at Sandy Point is predicted to be at 12 noon, I would expect to keep moving water at the rock piles until 2:00 PM and maybe longer. In periods of heavy rain or other extreme weather conditions the direction of the current might not change at all. There are some online sites that will help identify periods of peak current, but I’ve come to rely on this two-hour rule and find it to be unusually consistent. Remember that any current prediction is just an estimate under perfect conditions. There’s no substitute for on-the-water observations.
The Mixing Bowl
The area in the immediate vicinity of the Bay Bridge is the biggest mixing bowl on the Bay. Water in this area is in a constant state of flux, due to the proximity of several large fresh-water rivers, the geophysical narrowing of the Bay, and the turbulence created by the structure of the bridge. Scientists refer to this area of the Bay as the Estuarine Turbidity Maximum or ETM. The frequently changing conditions in this area require the light tackle fisherman to stay alert and to be open to experimentation as specific feeding patterns constantly morph into new ones.
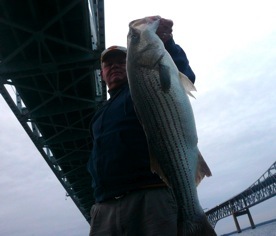 As the water warms in the summer stripers move up shallower around the bridge. They’ll often stay very close to the shore of the islands or suspend around the pilings. The changing water temperatures and salinity levels create thermoclines, pycnoclines, and haloclines throughout the area which may cause fish to suspend at certain depths. It’s important to identify these thermoclines so you can keep your lures in the strike zone as long as possible.
Even though I fish the bridge at whatever time of day I have available, I still pay very close attention to where I am in the tide cycle. The fish around the bridge usually follow seasonal patterns that are current related. For example, if I find fish on the last hour of the incoming at a specific set of pilings, that’s where I want to be the last hour of the incoming the next time I go out.
The Pilings
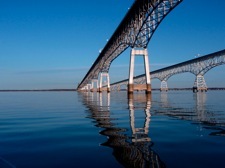 At the time of this writing I’ve just completed a three-week stint of every-evening light-tackle bridge fishing. A wise fisherman once told me that he had fished the bridge for 25 years and still hadn’t learned half there is to know about it. While it is a complex system, I’ve managed to learn a few things in my years of Bay Bridge fishing. My strategy is simple; hit as many spots from one end of the span to the other until I identify a pattern, then work the pattern until it is exhausted. Since I usually launch at Mattapeake, I start fishing the eastern side of the bridge where the depth ranges from 6 to 30 feet.
My first goal when approaching the bridge is to identify the intensity and direction of the current. I motor up to the pilings slowly and look to see which side the water is pushing against. If there is outgoing current, there will be a wake behind the south side of the column, incoming is of course the opposite. Sometimes the wind may bend the current so that it seems to be flowing slightly from one side or the other instead of directly up or down the bay. Observe closely, this can be important to estimating your drift and locating the fish.
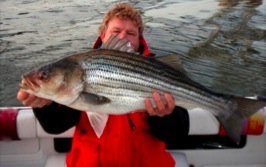 Once I have a good grasp on the current flow I position the boat downstream so I can cast up into the current as close as possible to the piling. I don’t spend a lot of time looking at the fish finder around the pilings. Often there will only be one or two fish around each column, so they usually don’t show up. I motor up within easy casting distance, then swing the boat so that I’m casting from the stern. This can be important in allowing you to escape quickly if a sudden gust of wind blows you toward the concrete. A word of caution here, stay well away from the pilings until you have a very good idea of how your boat will drift, especially if the current is very strong or it is windy. It only takes a split second for conditions to change and your boat can quickly get smashed against the concrete. For this reason it’s never a good idea to anchor close to the bridge. There are also rocks, cables and other debris on the bottom that are likely to snag your anchor. It’s illegal to tie off to a piling and the area is well patrolled.
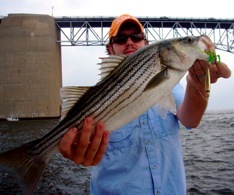 Before I start fishing I almost always kill my engine. Even though the bridge is a noisy place and sound is transmitted down into the water from the traffic above, the fish are still sensitive to engine noise. It puts them on guard so they aren’t as willing to strike. This is even more important in the summer when fishing pressure is heaviest. The exception to this is when it’s very windy or otherwise too dangerous to turn off the engine. As in fishing anywhere, the sneakier y
ou are the more fish you will catch. Sometimes just drifing through beside the pilings is all it takes to turn the fish off. If you’re very quiet you’ll sometimes see white perch nibbling on algae or blue crabs holding fast to the pilings. I’ve spent some entertaining evenings netting “doublers” – a molting female being protected by a hard-shell male – off the pilings.
My first cast is always directly toward the front of the column where the current is flowing against it the strongest. The fish are usually suspending around the sides or backs of the piling waiting for unsuspecting baitfish to come down current. They’re watching the front of that piling to see what’s coming for dinner!
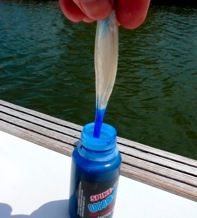
I try to judge the flow and time my cast so that my lure drifts down and either brushes against the column or passes close by at the depth I think the fish are holding. In depths of 30 feet or less, this is often near the bottom. Once the lure hits the water I raise my rod tip quickly to strip line off the reel so the lure will fall faster. In high current situations I use either ¾ or 1 ounce jig heads with 2/0 to 4/0 hooks and soft plastic baits like Bass Assassins, Bass Kandy Delights or my new favorites, Mann’s HardNose jerkbaits. In the summer I use Strike King’s new generation plastics because they’re resistant to bluefish bites. My favorite colors are chartreuse, pearl and pink. I often dip the tails of my lures in scented dye to add variety to the presentation. I call any after-the-fact modifications such as dye or paint “hotrodding.” It’s a good way to generate extra strikes.
The size of the bait matters. I try to “match the hatch” or use a lure that closely resembles the baitfish in the area. In the summer, this usually means 4 to 6 inch lures. Metal lures also work well when fish are holding near the bottom around the pilings. When bluefish are around in force, metal may be the best choice. My favorites metal jigs are Hopkins Shortys or Stingsilvers in the 1 to 2 ounce weight range.
In 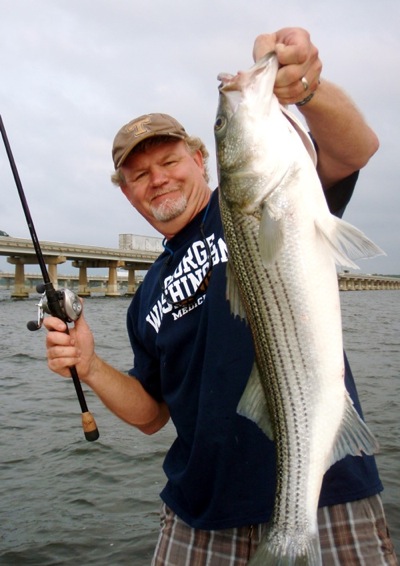 times of lower current or when the tide is slack, I use much lighter jigs. ¼ to 1/2 ounce heads are appropriate now. The lighter the jig head the more action you’ll get from the soft plastic lures. When there is no current I might not use any weight at all, but rig the lure weedless with the hook still embedded inside the plastic. This is also a good time to use a finesse worm, a pig & jig type rig, or other slow sinking bait. I move the boat right up against the piling and jig it vertically as close to the concrete as possible.
A good rule for fishing weighted jigs on the shallower pilings is that you need to be able to feel your lure hit the bottom. On the deeper ones, feel for the submerged crossbars. This is often essential to getting the fish to strike. Even if fish aren’t holding on the bottom, it’s also a good way to judge your sensitivity. If you can feel your jig head when it bumps the sand or concrete, you will be more likely to feel strikes. Once you feel the bump, give your rod a quick upward snap then follow your lure back down with your rod tip keeping slack to a minimum until it bounces again. Repeat the bump and jig routine immediately. When you’re moving quickly you’ll probably only get a few bottom bounces before it’s time to reel in and cast again. My articles on light tackle jigging explain this technique more thoroughly.
After my first cast in front of the piling, my next casts are right along side them, still throwing slightly upstream and allowing for the current. It’s extremely important to keep the lure moving at approximately the speed and direction of the flow. Jigging against the current rarely produces. Even though I’ll sometimes catch a fish this way I know it’s an accident. Fish face upstream. Bring the lure in front of their mouth and they’re more likely to bite. Many of the shallower pilings have a wide concrete bass at the bottom. I like to jig on and around that base. Once I’ve drifted by, I cast back upstream. You’ll need to strip line even faster on these casts because the speed of the boat will start pulling your lure immediately back toward you. This can be your most productive cast, so stay alert!
If I think I’ve fished the piling well and got several bottom bumps on the first pass, I’ll mo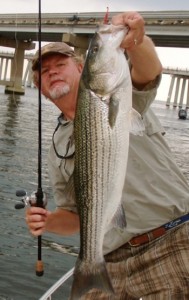 ve around to the other side and repeat the process. If I catch fish, I’ll drift again and keep fishing the same piling until the fish are gone. I pay particular attention to the shady side because fish often hold here out of the sun in summer months, the sunny side in the winter. If I don’t find fish, I move on to another set of columns. I like to start at the shallow end of the bridge and work deeper, but where you start doesn’t really matter. Watch your fish finder closely as you move between the columns. It doesn’t happen often, but sometimes a school of fish will hold in the flats between them. This is more likely in late spring and early summer or on hot days when the shadows of the bridge provide a shady resting place. Drop a lure!
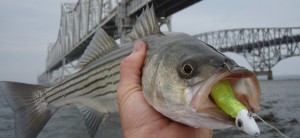
Hard plastic or wooden plugs will also produce around the pilings. Rattletraps and Rebel Deep Wee Rs are my favorite crankbaits for this area. In order to effectively mimic the bait, they should be fished as close to the pilings as possible, bumping it whenever possible. Bending the eye of a crankbait to make it intentionally run sideways into the concrete can be amazingly effective. Also don’t forget top-water. Some of my biggest bridge fish have come on top-water lures thrown around the shallower east-side pilings.
 If the shallower pilings aren’t producing I move to the deeper ones. There are distinct ledges and drop off along the bridge and you’ll quickly identify them with a good fish finder. Once the water gets over 30 feet or so, piling fish are usually suspended. I fish these pilings the same way as the shallower ones, but instead of allowing the lures to sink all the way to the bottom I start my jigging retrieve at varying depths to see where stripers might be holding. Some of my favorite deep pilings at the Bay Bridge are the ones that have 4 poles beneath a square platform. Beneath those pilings is another concrete square where fish can hide. All the deeper pilings have submerged concrete crossbars at various depths. My favorite ones are down about the 8 to 12 foot range. If you judge it right you can actually jig along these crossbars. The fish are often just over or under them. Jig along until you feel it fall off then let it fall for a few feet, resist the urge to jig, just watch your line and be alert for strikes. This is one of my favorite techniques for mid-summer fishing at the bridge. Be careful, it’s easy to hang up and even harder to get a big fish out through the maze of concrete.
The Rock Piles
After I’ve exhausted the piling bite, I’ll move on to the rock piles. I might even reverse course and start at the rock piles on some nights, but these areas are well-known by fishermen and often crowded to the point of being over-fished. I prefer to fish them on rainy or windy days when the crowds are down. I almost always start at the rock pile closest to the eastern shore. The bottom here is firmer than it is on the western side of the channel, but somtimes the west side holds more fish. As I’ve said in other articles, I’ve nicknamed the rock piles “LTJ University” because it’s where I learned to jig for rockfish on the Chesapeake Bay. Because of the complex currents, rapidly changing depths, and necessity for innovative presentations, they present unique challenges to a light tackle fisherman. You can take the principles you learn while fishing here and apply them anywhere else on the bay.
Fish like to ambush bait that is swept by the current against the rocks. The rock piles hold lots of perch and other smaller fish that stripers will eat. Since the current is always stronger on the channel side, the up-current channel-side corner of the rocks usually holds the most fish. The biggest mistake I see fishermen make is fishing the wrong side of the rocks. While there may be a few stray fish here and there, they’ll most often be stacked up in an area no larger than a pick-up truck bed on the up-current corner.
When the fish are really “on,” or there are lots of fish in the area, they may be anywhere around the ![BBRock2[1] BBRock2[1]](http://www.chesapeakelighttackle.com/wp-content/uploads/2009/01/BBRock21-300x225.jpg) rocks, but still more frequently on the up-current side. Watch for boils or rips in the water where it is rolls up in front of the island. When the water is stained there may be a color change here because the obstruction in the current forces cleaner cooler water up from down deep. In the winter this creates the unusual effect of clear-water halos around all the islands and pilings. Fish will often gather in the clearer water. Since clarity greatly influences striped bass fishing, it’s occasionally possible to take advantage of this halo effect when other areas in the upper Bay are completely unfishable. Fish may also hold in the deep area beside the island where the current is always strongest. This is especially true in the fall of the year when the fish are most energetic and feeding-up for the upcoming colder weather.
rocks, but still more frequently on the up-current side. Watch for boils or rips in the water where it is rolls up in front of the island. When the water is stained there may be a color change here because the obstruction in the current forces cleaner cooler water up from down deep. In the winter this creates the unusual effect of clear-water halos around all the islands and pilings. Fish will often gather in the clearer water. Since clarity greatly influences striped bass fishing, it’s occasionally possible to take advantage of this halo effect when other areas in the upper Bay are completely unfishable. Fish may also hold in the deep area beside the island where the current is always strongest. This is especially true in the fall of the year when the fish are most energetic and feeding-up for the upcoming colder weather.
Since currents can be strong and unpredictable, it’s a good idea to watch for a while before motoring in and positioning the boat. The banks drop off quickly to more than 55 feet but there are some big rocks just under the surface so don’t get too close. Once you’ve figured out the drift and you’re sure your boat won’t hit the rocks, kill the engine. The fish here are much more sensitive to engine noise than on the pilings. I start by casting shallow then work deeper always beginning at the up-current 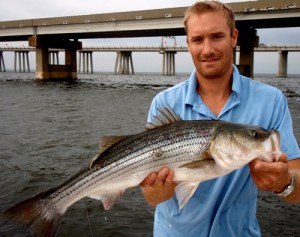 channel-side corner. Don’t be afraid to make your first casts right up against the rocks. Allow the lure to fall briefly and begin jigging it back to the boat allowing it to drop like stair-steps down the rocks. You’re likely to hang up occasionally, but the rewards make it worthwhile.
Pay close attention to your fish finder around the rock piles. You can often mark fish and hone in on a specific area, but don’t skip the corners even if you don’t mark them. They’re probably hiding down there somewhere. When I’m working deeper I often switch to metal lures. Just like when I’m fishing the pilings, my favorites are Stingsilvers or Hopkins Shortys. 1.5 or 2 ounce is the preferred size. I always replace the treble hooks with singles because it seems to give the lures more action so they catch more fish.
Vertical jigging will work at the rock piles, but the current is usually so swift that you have to cast most of the time. Throw upstream and estimate the direction of the drop of the lure so that it hits the bottom above where you think the fish might be. It’s unusual for fish to suspend around the rock piles so you’ll almost always want to be bouncing the bottom, even at the deepest points.
I experiment with my presentation until I find one that works. Sometimes it’s a straight drop so the lure is right under the boat, sometimes it’s downstream and cross current so the lure is bouncing at an angle across the bottom. At other times, a completely different presentation might be called for. Jigging against the current only works when the fish are very active. What works one day may not work the next. One thing is for sure, during the summer and fall when the current is moving there will be fish somewhere around those rocks. Experiment until you find what will catch them.
As the seasons change so do the habits of the fish at the bridge, but they’re almost always somewhere around this exciting area. The principles and techniques that work on the east side will also work on the west. A patient light tackle angler with the right tools and knowledge can almost always catch fish here. I can count on one hand the number of times I’ve been skunked at the Bay Bridge. It happens, but it’s rare. In subsequent articles I’ll take a look at other good fishing spots in the immediate area. There are many in this exciting and amazingly productive section of the Bay. If you see me out there in Thunder Road stop by and say hello. Good luck and good fishing!
Copyright © 2008-2009 Chesapeake Light Tackle.Com All Rights Reserved


Nice job, very accurate info.
I’m a light tackle guy too, and a hotrodder of soft plastics.
Enjoyed the read!
Bill
Hey Bill… did I meet you Bass Pro the other day? KEY WEST 239fs! Talked for 1/2 hour about exactly this! Be down there early Friday AM! Hope to see you out there!
Hello Shawn: I consider myself fortunate in having found your site. The info on fishing the Chesapeake Bay is most informative and your writing superb. I live in San Luis Obispo, CA and have started to visit my daughter and her family in Virginia Beach 2 to 3 times a year. I love to fish but have never fished on the East Coast. Your articles have been great in helping me to plan for fishing the Bay. Thanks again and please continue your postings. George Suchand
Check Your Google Pagerank – Website Ranking Checker…
Check your Google Pagerank, backlinks, found web pages about search results in order to find social links….
Tailors In Hoi An…
Light Tackle Techniques for the Chesapeake Bay Bridge | Chesapeake Light Tackle…
Spring Break Vacation…
[…]Light Tackle Techniques for the Chesapeake Bay Bridge | Chesapeake Light Tackle[…]…
west gate…
[…]Light Tackle Techniques for the Chesapeake Bay Bridge | Chesapeake Light Tackle[…]…
All of this info is so helpful, thanks alot. Im a young fisherman that just purchased a 14 ft fiberglass V bottom boat with a 20 hp motor. I launch from Sandy Point and always wanted to fish under th bridge. Now i know what to use and how to fish it. Hope to see you out there soon, Ill be on a small boat with a shark face on it haha.
search optimization…
Light Tackle Techniques for the Chesapeake Bay Bridge | Chesapeake Light Tackle…
canon eos bg
Light Tackle Techniques for the Chesapeake Bay Bridge | Chesapeake Light Tackle
Rehoboth Massage and Alignment
Light Tackle Techniques for the Chesapeake Bay Bridge | Chesapeake Light Tackle